You must submit digital copies of your Photo and Passport when you apply for an eVisa. Occasionally, these pictures aren’t entirely correct; they could be grainy, poor quality, or simply subpar. But don’t worry. New ones can be uploaded with ease.
All you need to do to update your papers is a few easy actions and a dashboard trick. Let’s go through the steps.
Caption: Step-by-step instructions on how to re-upload documents to your application.
If you don’t want to go through all the texts, don’t worry!
We’ve got you covered with this comprehensive video tutorial that walks you step-by-step on how to re-upload documents to your application.
Step-by-Step Guide to Uploading Your Photo and Passport
Whether you’re uploading these documents for the first time or updating them, here’s exactly what you need to do:
Step 1: Log In to Your Account
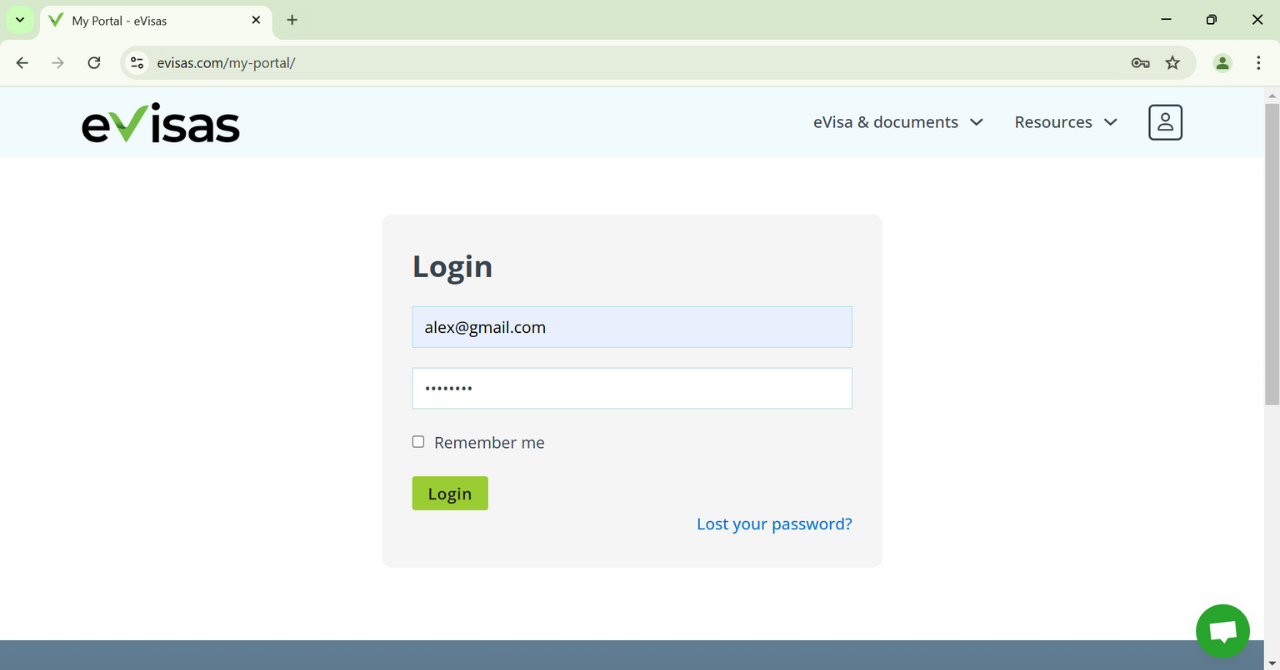
Logging into your account is the first step in the procedure. Make use of the password and email linked to your application. Because it guarantees that you can access your account and modify your application, this step is crucial.
Step 2: Go to your Account Dashboard
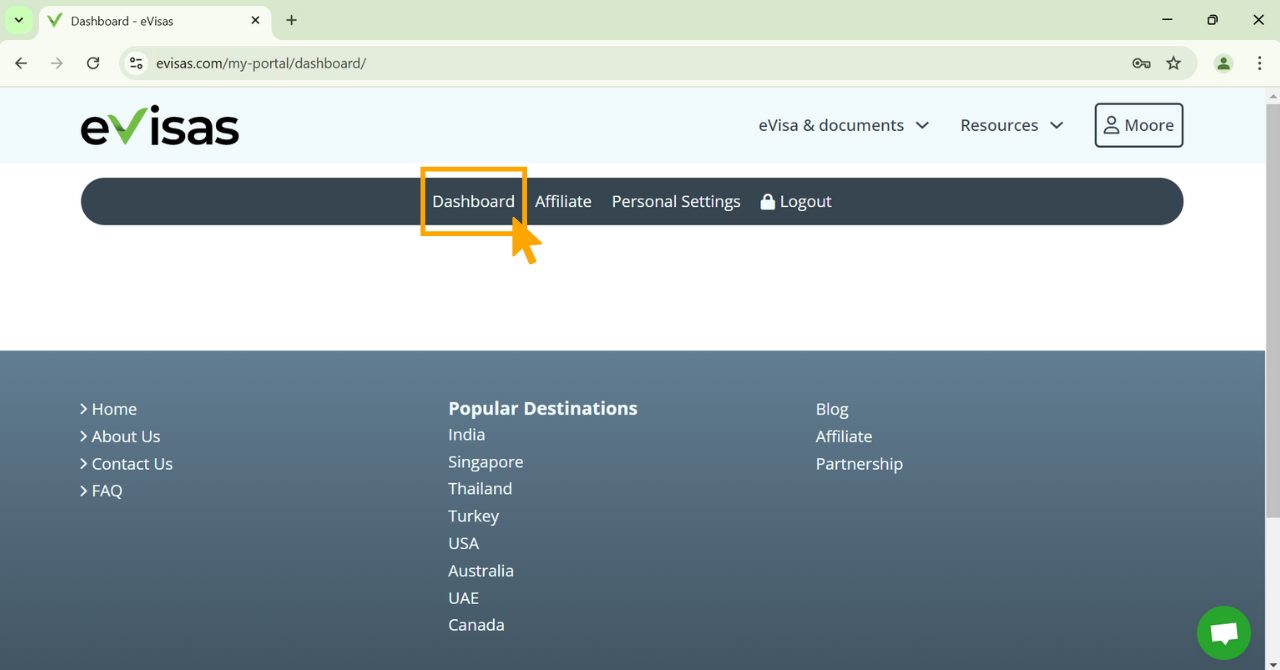
Go to your Account page after logging in. You can locate all of your application information in one location by selecting the “Dashboard” option.
Step 3: Access Your Application
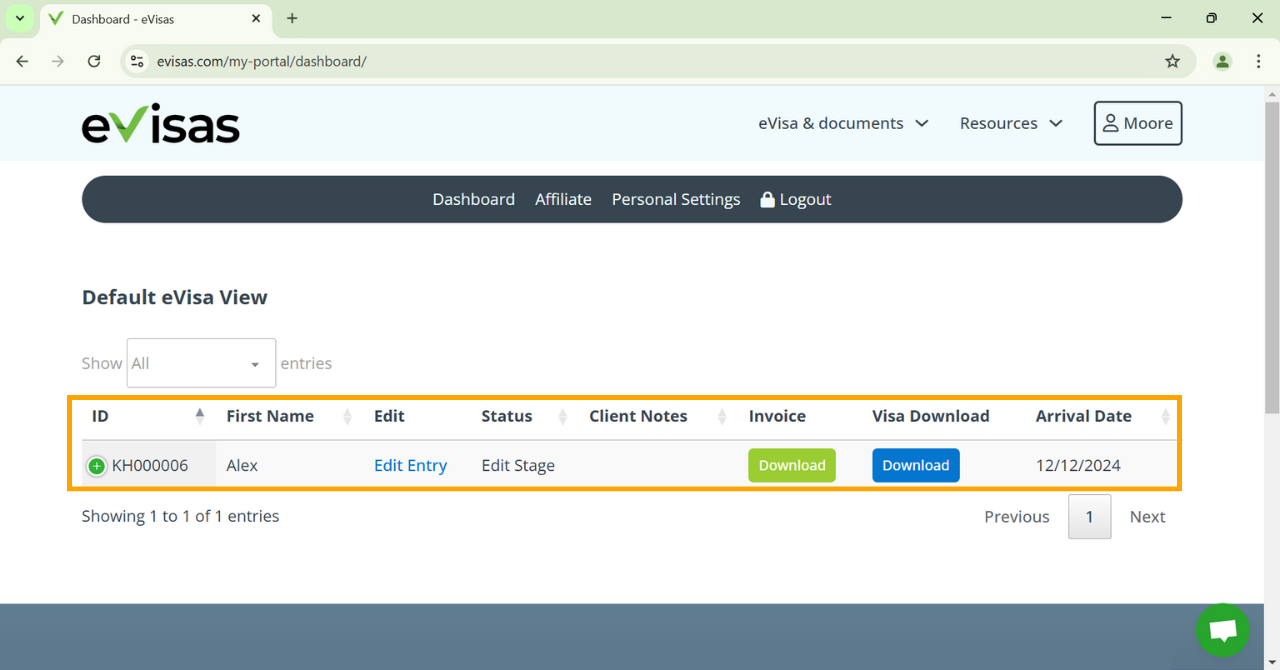
Your application should appear under your name on the Dashboard. To make any modifications to your application, locate the ‘Edit Entry’ button next to it.
Step 4: Select ‘Edit Entry’
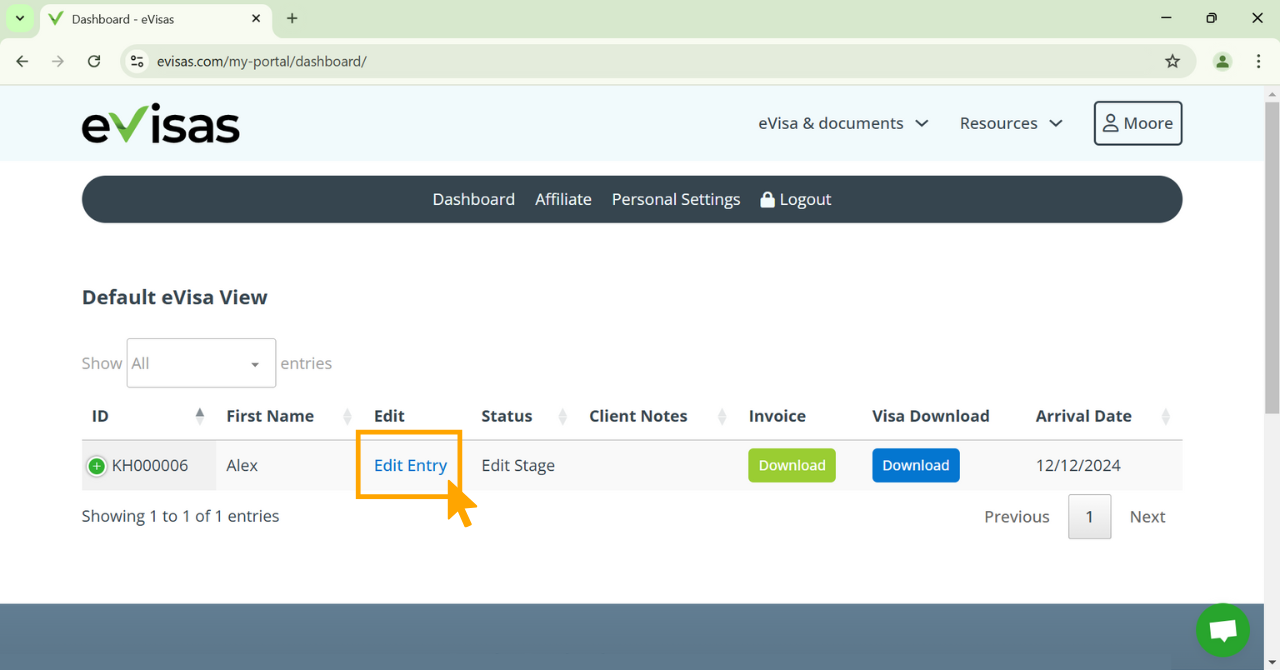
You can update or modify information by clicking on “Edit Entry,” which allows you to upload a new passport document or photo.
Step 5: Open the Upload Sections
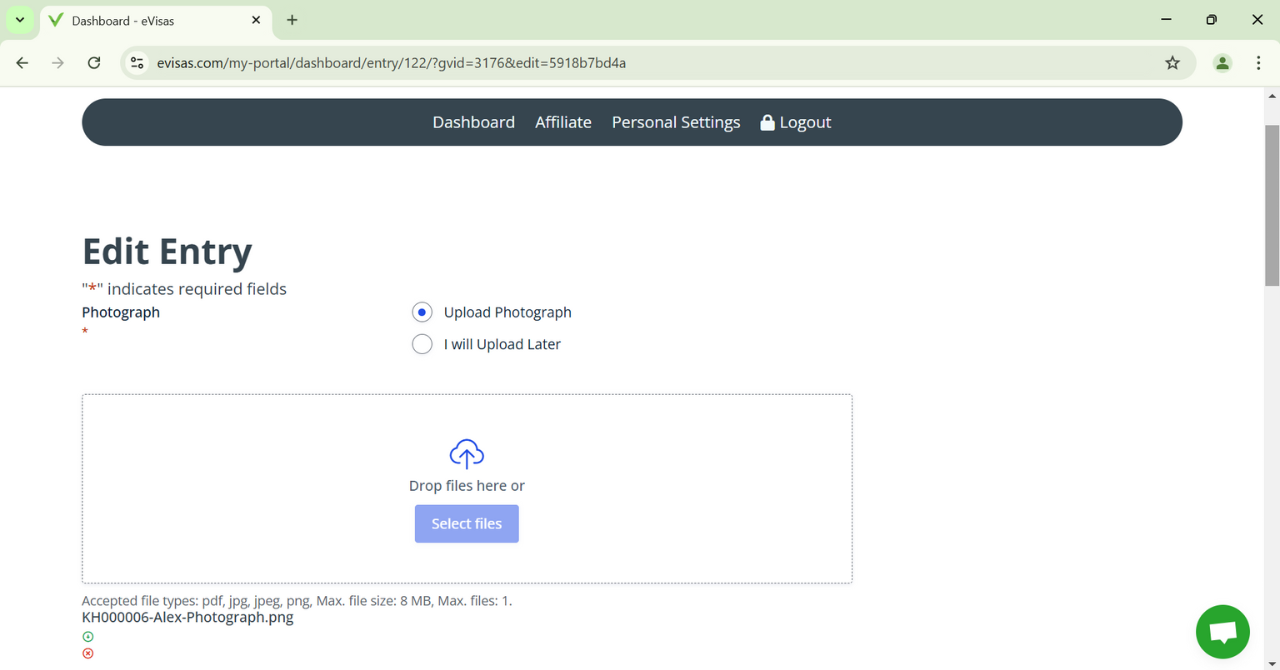
The upload parts are now visible, where your most recent photo or passport is displayed. Here is where you can get rid of any old pictures.
Step 6: Get Rid of the Current Picture
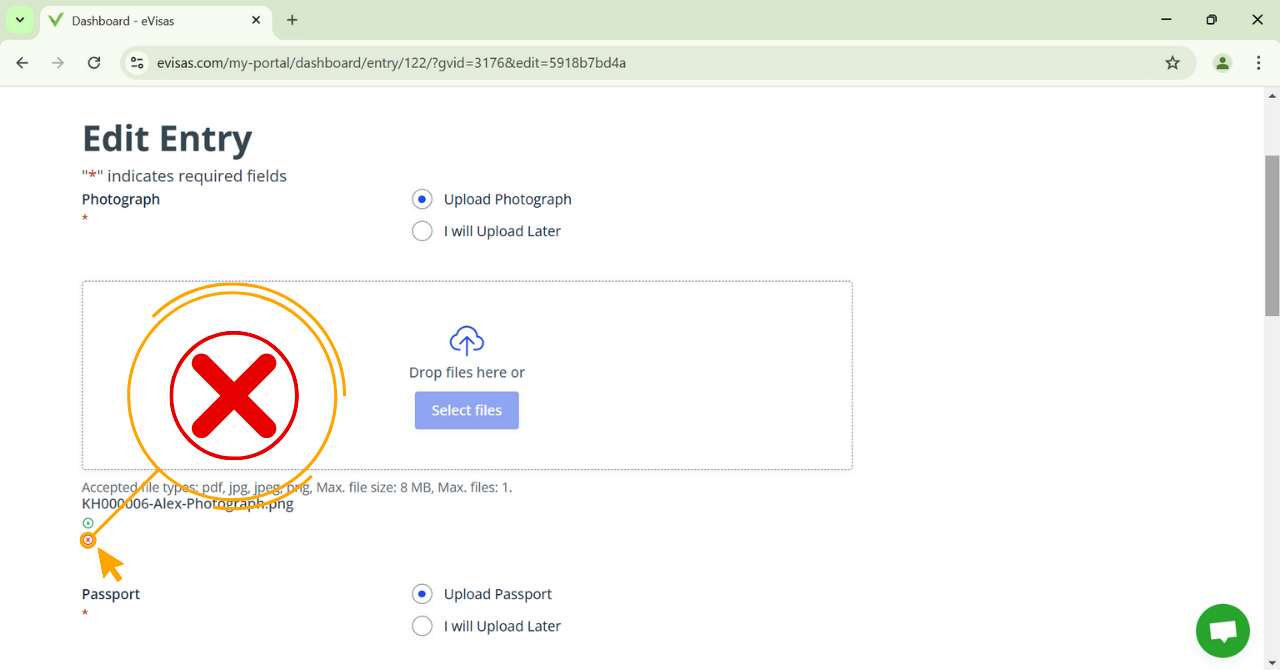
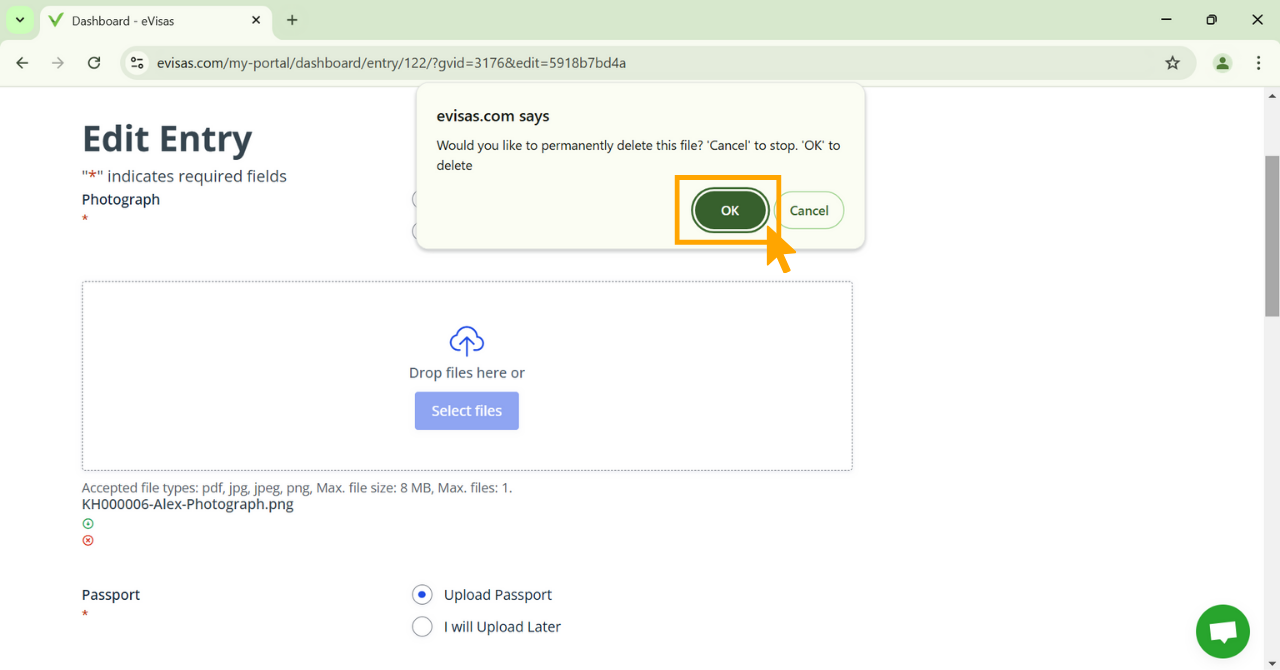
Click the “Remove” button, which is typically indicated by a “❌.” Your browser will ask you to confirm this action after you’ve done it. To delete the current photo or passport image, click “OK.” This is crucial since it guarantees that the prior image is removed from your program.
Step 7: Upload a New Photo or Passport
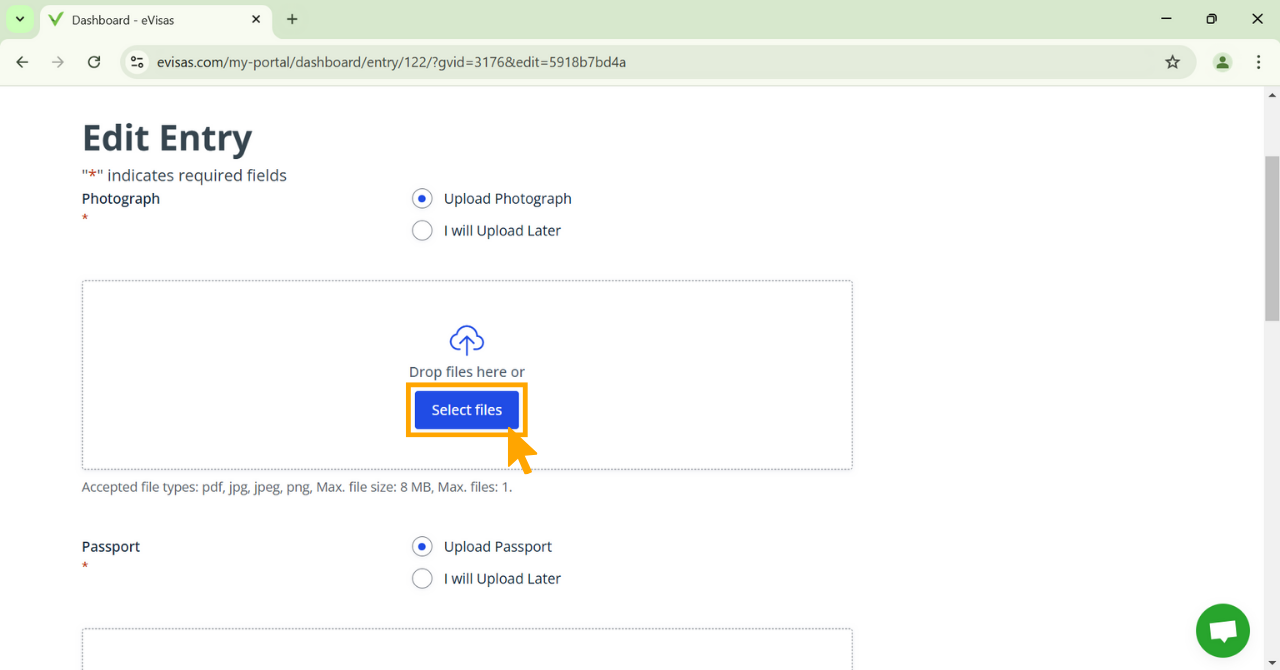
The new image can now be added once the old one has been deleted. To find the updated image, click the “Select Files” option and search your computer. Select a high-quality image that satisfies the application’s requirements.
Step 8: Repeat for Passport, If Needed
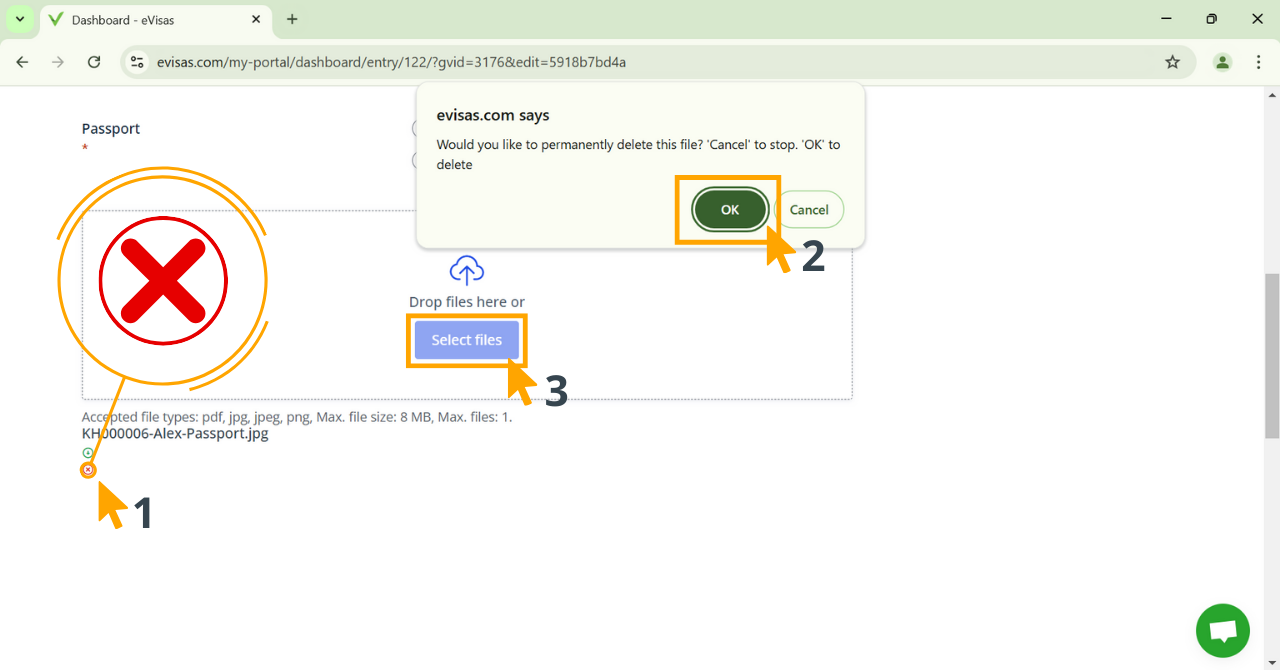
Use the same procedures if you also need to update the image on your passport. To upload the new passport photo, remove the old one, click “OK,” and then click “Select Files.”
Step 9: Save and Update Your Application
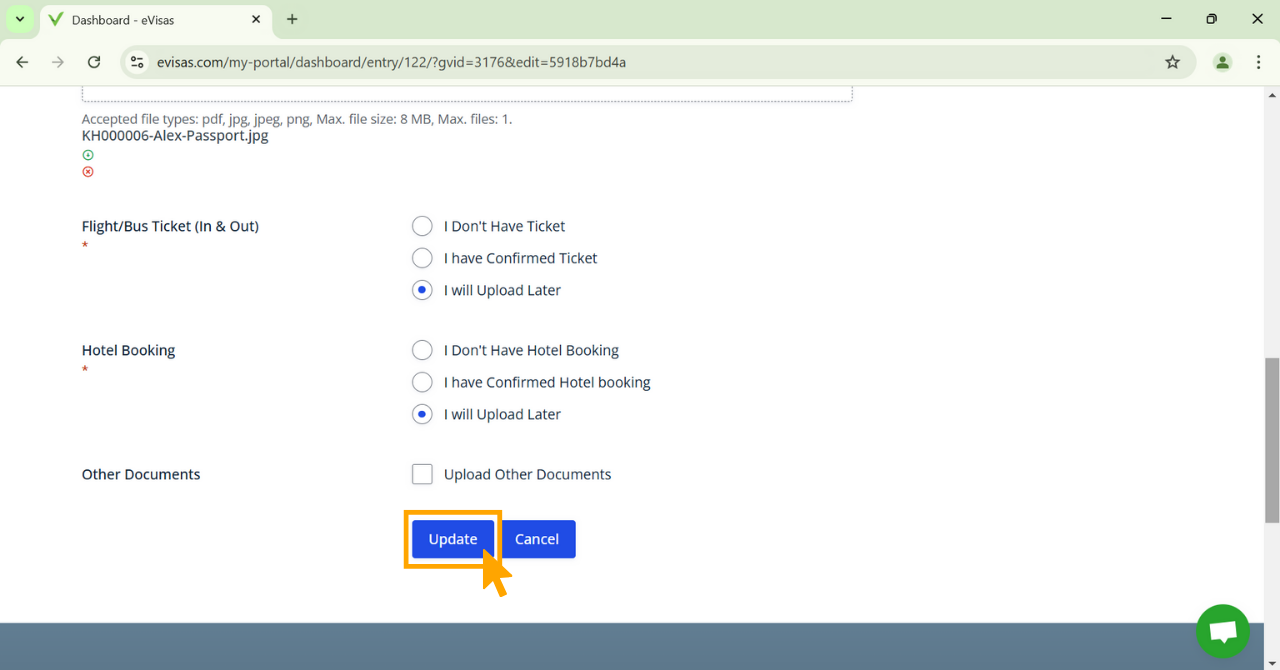
After uploading your new documents, click “Update” to save all of the changes. By doing this, you can be assured that your passport photo and updated photo are safely kept in your application.
This detailed tutorial will make it easy to update your photo and passport on an application. If you have any questions, please feel free to contact us.


